Showing posts with label Cemetery Restoration Workshop. Show all posts

Friday, March 30, 2012

Cemetery Workshop Registration Open!

Many people have asked me where I learned the techniques for restoring and preserving headstones.  I began with a class offered by the Department of Natural Resources (DNR) in conjunction with the Indiana Historical Society.  It is a two part series which must be completed in order.

If you are interested in preserving cemeteries (and I hope you are!) and are located in the Midwest, registration for the beginning class is now open.  The class will fill up quickly to sign up soon.  If you miss this beginning class you will have to wait another year to begin the process!


Registration for the 2012 Basic Cemetery Preservation Workshop is now available. The workshop will be held May 18 and 19 at the Old Southport Cemetery in Southport (just south of Indianapolis). 

You may now register online by going to www.indianahistory.org/our-services/local-history-services/workshops and clicking on “Register online now”.

Please note there are two options to choose from for the workshop:

Option 1: Friday Afternoon Classroom and Saturday All Day Cemetery Work
Option 2: Friday All Day Cemetery Work and Saturday Morning Classroom

Please let us know if you have any questions.

We hope to see you there!

Sincerely,

Jeannette Rooney
Coordinator, Local History Services
Indiana Historical Society
Eugene and Marilyn Glick Indiana History Center
450 West Ohio Street
Indianapolis, IN 46202-3269
(317) 233-8913
(317) 234-0427 (fax)
jrooney@indianahistory.org

Discover the Indiana Experience, A New Way to Live History
Featuring You Are There 1920: Busted! Prohibition Enforced
and You Are There 1968: Robert F. Kennedy Speaks
Let revolutionary hologram technology sweep you up in a night that changed history.

Tuesday, March 6, 2012

Tombstone Tuesday - How a Cemetery Hero and Find A Grave Bring Martha Home to Her Family

Back in August 2011 I wrote a posting about my Cemetery Hero.  You can read it here.

The story was about the cemetery restoration workshop I took and a vandalized stone that had been thrown over a fence and down a hill.  There was a man at the workshop that day, John.  He was attending with his wife and felt moved to retrieve the stone and put it back on its base.  The stone was large, the hill was steep and the story of John's determination moved all of us that day.

When I returned home from the workshop I created a Find A Grave memorial for Martha DeMott and added what little information I could.

Fast forward to yesterday when I received a Suggest A Correction to Martha's memorial from a fellow Find A Grave volunteer.  Upon further conversation it turns out this gentleman is one of Martha's descendants.  I promptly transferred the memorial to him.

John brought Martha from the bottom of the hill but Find A Grave brought her home.


Find A Grave Memorial for Martha DeMott can be found here.

Tuesday, September 27, 2011

Tombstone Tuesday - Cemetery Restoration Training

I have had so many wonderful comments on my post Tombstone Tuesday - Genealogy Serendipity regarding the restoration of Rebecca CAROTHER's gravestone.  Along with those comments came some questions as to how I was allowed to do this type of restoration in a cemetery in Indiana.  Great question!  I'd love to share the answer here.

In the state of Indiana there are laws regarding what you can and cannot do in a cemetery.  I assume each state has its own set of rules but I will just be dealing with Indiana law in this post. To read the complete list of laws for Indiana click here.

Here is a list of some things that aren't against the law but I really wish you wouldn't do!
 - Take rubbings of any kind on an old stone
 - Use chalk or shaving cream to try and read a stone better
 - Use bleach or any other household cleaner in an attempt to clean a stone

In order to do the work I did in Boundary Line I had to complete the following requirements:

1.  I had to take the Beginning Restoration class in Indianapolis in May.  This was a two day class taught in conjunction with the Division of Historic Preservation and Archaeology, Department of Natural Resources (DNR) and the Indiana Historical Society.  Since I am located in South Bend I had to pay not only for the class but also for hotel, food and travel expenses.  But the value of that class is priceless!  And to meet others also interested in cemetery preservation was so much fun!

2.  I had to return to Indianapolis in August to take the Advanced Restoration class which provided us with hands on experience in repairing, locating and resetting stones in an old, historical cemetery.

3.  I had to get permission from the cemetery owner to do the work.  In this case it was Boundary Line Church.  However, I will be back in Wabash County in October in another cemetery which is owned by Liberty Township.  In that case I had to get permission from the Township Trustee.

4.  I had to get permission from the private land owner.  This, again, was Boundary Line Church.  However, for October it is the farmer whose property that cemetery is located on.

5.  Once I had completed the above steps, I had to file for a permit with the Director of Special Initiatives, Division of Historic Preservation and Archaeology, Department of Natural Resources, DNR.  They reviewed my training and the permissions I had obtained and issued a permit.  I must carry that permit on me while performing the work in order to be in compliance with Indiana law.

So, you see, there was a lot of work done before I was ever able to receive the permit!  But it was all worth it to fix Rebecca's stone.  And not only would I do it again but I will be in October!  This time in  America Cemetery, La Fontaine, Indiana.  Joining me on that adventure will, once again, be my husband, mom, dad and my "cousin" Dee Dee.  The focus of our work that day will be this stone:


Hezekiah Rinearson served in the Civil War with the 47th Indiana Infantry, Company G.  He died at home on 16 Aug 1863 at the age of 31.   His stone certainly needs to be repaired.  Who knows what serendipity may come our way!

Thursday, August 11, 2011

A Cemetery Hero

This is John.


John is just your average middle aged man who attend the Cemetery Restoration Workshop with his wife.  But John saw something that day that disturbed him.  You see, while Workshops have been held in this cemetery for the past three years and so much great restoration work has been done, one thing had not been corrected until John came along.

You see, sometime in the past, a couple of vandals came along and threw a stone over the fence and down the embankment.  This picture will give you an idea of the terrain it was thrown in.


This hill is much steeper than you can see in this picture and the area is covered in poison ivy.  Also, the stone was large.  Due to it's size, the location and the manpower it would take to get this stone up the hill and over the fence, it had remained there.  Walt, Micki, D.B and Bird were all aware the stone was there and all wanted to bring back up the hill.  The stone is of a woman simply known at the time as "Martha".  Until the team could figure out how to raise the stone she would remain at the bottom of the hill.  That is until John came along.

Following lunch that day the hands-on portion of the restoration workshop began.  John stood up, threw his lunch away, brushed off his hands and announced "that stone is coming up".  And off John went.

First he gathered straps and pulleys and then John hopped over that fence.  He rolled the stone as far up the hill as he could by himself and then he put together a system of straps and pulleys and began to move that stone up to the fence line.  About this time Walt saw what John was doing and hurried over to help.  Eventually the men set up the tripod and began working as a team to move the stone over the fence.

And that is exactly what they did.

Once they had it over the fence a group of volunteers worked to get it set back on its original base.  I asked John to please step into the frame so that I could take his picture with Martha's stone.  He hesitated and had to be convienced by those around to step into the photo.  He didn't think he had done anything special.  But I do.


John came to the workshop that morning just an ordinary man.  But he left as my cemetery hero.

You can visit Martha's Find A Grave memorial here.

To read the entire series of the Cemetery Restoration Workshop click here for post 1 and here for post 2.

Wednesday, August 10, 2011

Wednesday's Child - George B. Stuck - Cemetery Restoration Part II

You can read part one of my Cemetery Restoration Workshop here.

After lunch we were all encouraged to get our hands dirty and, under the direction of Walk, Micki, Bird and D.B, we should try our hands at restoring a stone.  My mom, "cousin" DeeDee and I chose this stone:

It's the stone of 6 year old George B. Stuck who died in 1869.  His stone was found, in pieces, buried in the corner of the cemetery along with a few others.  Micki was able to determine the original location of his burial and we were to repair, clean and reset the stone in it's proper location.  Following the directions given to us and under the watchful eye of D.B. we began the process.


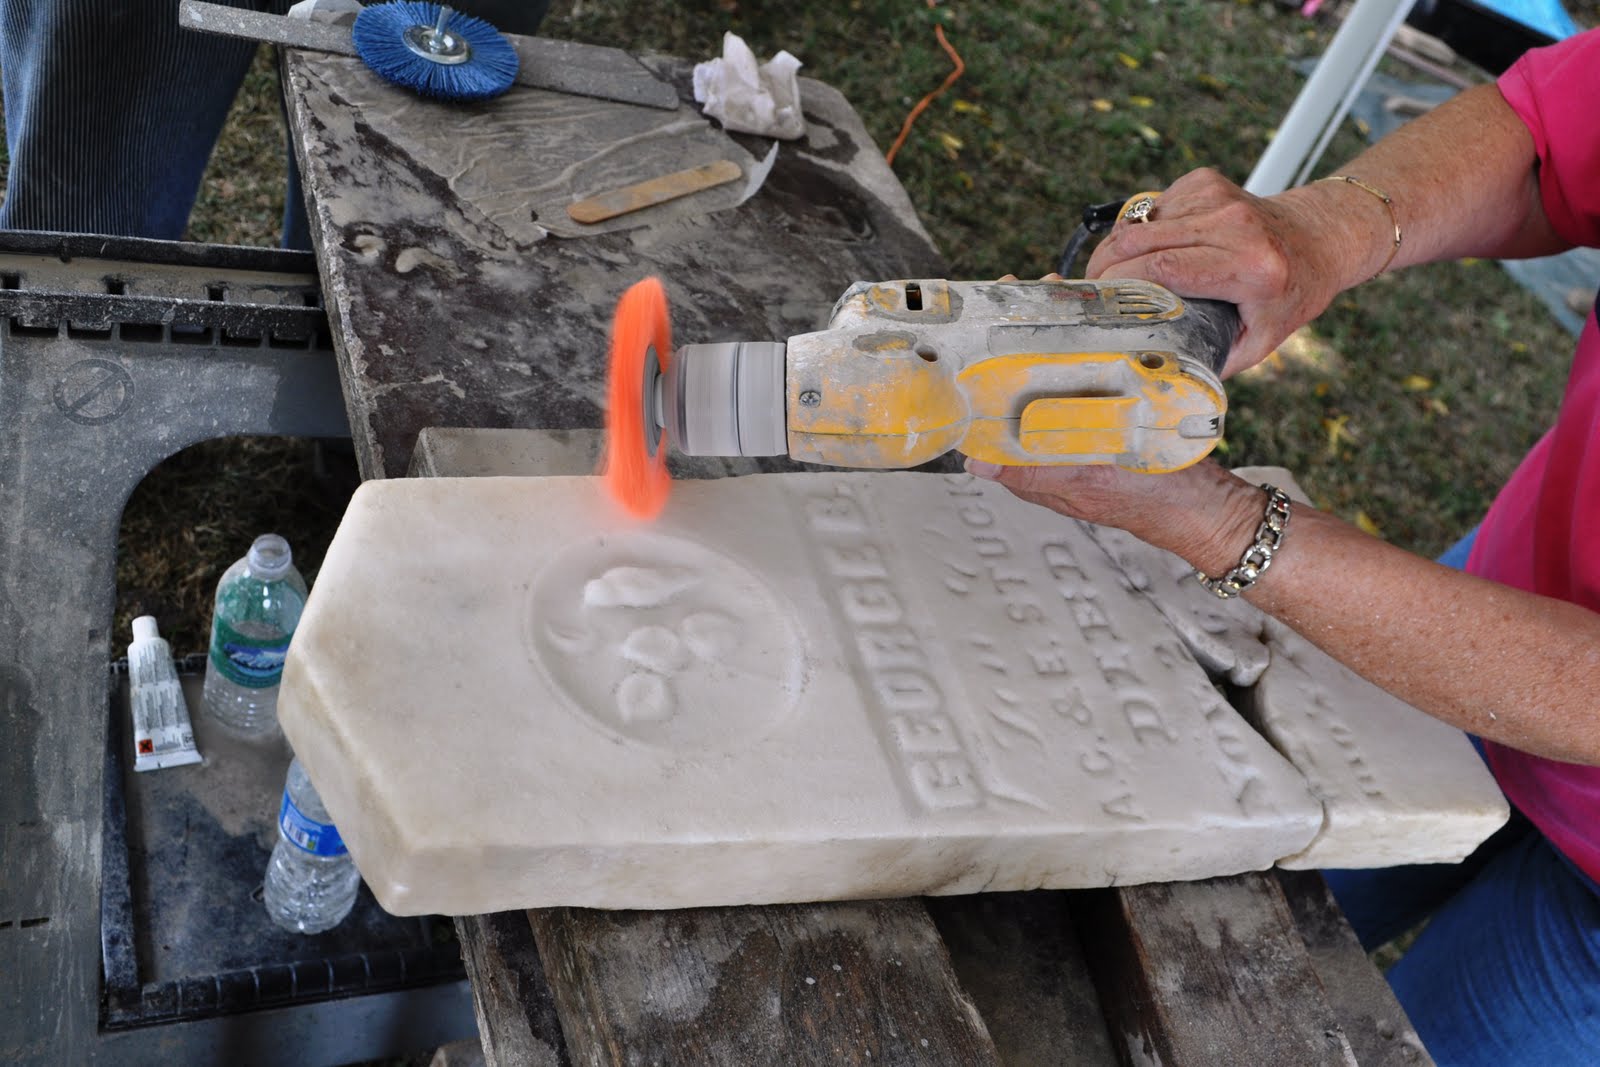
Here is DeeDee cleaning the broken edges of the stone.  This process is made easier using a drill with a nylon brush head. 


Next we cleaned the broken edges to allow for good adhesion.


Then we dry fit the pieces together.  As you can see, there is a gap where a piece of the stone is missing.  However, all the information and writing on the stone is there.  We will use aluminum netting and fill in this area with mortar.

Next we applied the epoxy.

And waited for it to set.


Then the real fun began.  Cleaning.  We used a combination of ammonia and water and the nylon brush head to clean off the dirt and grime. 


Can you believe the difference!  It came out so clean!

Next we took the stone back to it's original site and soon discovered why it had broken.  Sometime in the past the stone had fallen over and someone had concreted it back into its slot.  This is always a no-no!  Don't use concrete to set a stone.  This does not allow the stone to give if it is knocked over.  Instead it will break as George's did.  It would take too much time to chisel out all the concrete and reset the stone in its slot we instead we used a mastic.


Here you can clearly see the missing section that we needed to fill.  The next step was to mix a mortar that would closely match the color of the cleaned stone.  Sadly this is where I failed in my photography!  I took the picture below after we filled in the void but failed to take one after the excess mortar was cleaned off the stone.  But you get the idea.


Here the stone is again.  Before and After.


Little George is once again at rest next to his brother John was also died as a child.  And I feel great about what we were able to accomplish. 

Tomorrow's post is entitled.  A Cemetery Hero.  Because that's how I see this man.  I can't wait to tell this story.........

Tuesday, August 9, 2011

Tombstone Tuesday - Cemetery Preservation Workshop

Saturday I traveled to Indianapolis to attend the Advanced Hands-On Cemetery Preservation Workshop sponsored by the Indiana Historical Society and the Division of Historic Preservation and Archaeology, DNR. 

We spent the day learning about how to reset stones, repair broken stones and how to find the original location of moved stones.  And, as only a fellow graveyard rabbit would understand, I had a BLAST!!

First of all the presenters, Walt, Micki, D.B and Bird, are so much fun to learn from.  They are passionate about cemetery restoration and eager to share their knowledge so that others can learn how to restore and preserve our cemeteries, and most importantly how to do no harm.  I love the quote from Walt "It don't take a rocket scientist to do this, but it does take a heart. And I got one of them."

Walt, who owns, Graveyard Groomer, is what you might call....a character!  Here he is below at the start of the morning explaining to the group the agenda for the day.


The first thing we learned was how to reset Stacked Monument/Oblelisks.


This is the stone Walt, D.B and Bird would be resetting.  Notice the name SMITH on the bottom?  Well, it is facing east.  Also the husband's name is facing east and the wife's in on the other side facing west.  Walt tells us that this is a sign that this monument has fallen in the past and someone has tried to repair it.  How did he know that?  Because it is stacked wrong!  According to Walt, the name SMITH would have been facing West as people at this time were buried facing west so that when judgment day came they would be facing in the correct direction.  If we looked around the cemetery we could see that that was true!  Also, the husband's information should be on the left side of the monument and the wife's on the right.  This is because the preacher "buried them as he married them".  In addition to repairing the loose stone, they would be putting them back in their proper orientation.


The first step is to lift the top stone off.  This is done using a tripod and a series of chains and straps all designed to do no damage to the stones.


Once the stone was removed we could see that, indeed, someone had tried to repair the stone in the past.  They has used concrete but it had not adhered properly allowing the stone to "walk" off it's base.  Most likely this was due to not cleaning or wetting the surface before using the concrete.  Step one of repairing this was to remove the concrete and clean the surface.  Here is Bird chiseling off the old concrete.  It came off easily and quickly.


After cleaning the surface of both stones, they applied a stacking mix and monument setting compound and restacked the stones.  Here is the finished product.  (With the stones in the correct orientation)!


Next we learned how to repair and reset a broken stone.  Here is the stone they would be demonstrating with.  (It had already been cleaned to save time in the demonstration).


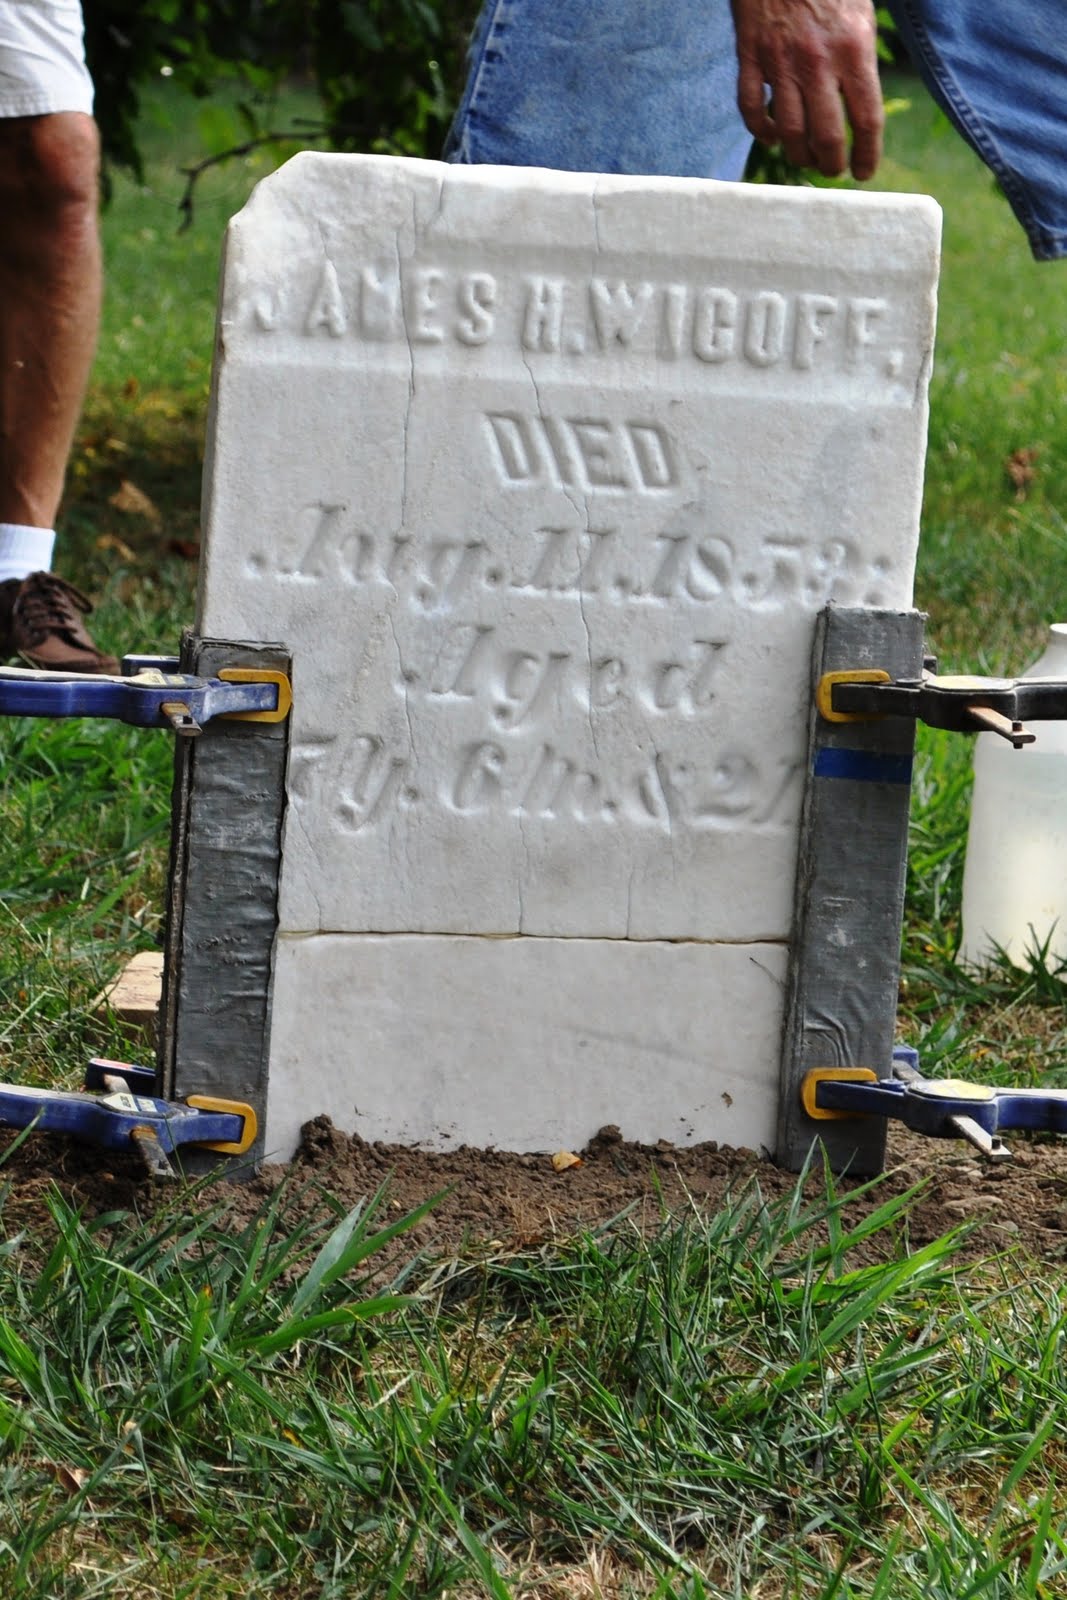
When repairing a broken stone the first step is always to dry fit the pieces first.  This is to be sure that you have all the missing pieces.  Next you need to clean the surfaces where the breaks are and then epoxy them together.  Once the epoxy is dry and the stone reset it needs to be cleaned.  Walt recommends a mixture of ammonia and water and a nylon brush.  As you can see in the example, the stone cleaned back to a brillant white limestone.  It's important to clean the stone before filling in any voids and cracks so that you can match the void mix to the color of the stone. 


The last step is to mix your mortar and fill in the voids and cracks.  This is where you can really see the great work Walt and his team do.  Look at the finished product!  You can barely see the crack and the mortar is not even dry yet!


Tomorrows posting, "Wednesday's Child", will focus on the stone myself, my mom and my "cousin" DeeDee repaired with our own hands.  It was the stone of a 6 year old boy that was found in 3 pieces buried in the corner of the cemetery.  We were able to repair it and reset it back in its original location.  What a great feeling that gave us!